Showing posts with label St. Patrick's Day. Show all posts

Sunday, March 8, 2015

St. Patrick's Day Just For You


I was in a St. Patrick's Day mood after creating my monthly plate design, but St. Patrick's Day wasn't one of the cards we were making for the March Stamp-a-Stack.  So I decided to call it a bonus card for anyone who wanted to make one more card.    I used the Work of Art stamp set for the stamping and punched small hearts for the shamrock - quick and easy!

Monday, March 2, 2015

St. Patrick's Day Plate

Here's my March swap to replace the Valentine plate I posted yesterday.  I've got it on an end table with a small Longaberger basket.  I must say they look good together!  The glass plate doesn't photograph well so I included two shots.  


Saturday, March 2, 2013

St. Patrick's Day Fun Fold

Fellow Stampin' Up demonstrator, Liz Orr, made this cute leprechaun into a pin several years ago, and I have always planned to make on myself.  Well this is the year!  I put him on the front of this fun fold. I don't have a name for this fold as I got it a few years ago as a swap and have never seen it again. 

'

Saturday, March 3, 2012

St. Patrick's Day Nugget Holder


I first saw this idea on Pinterest, but when I followed the link, it took me to a blog that wasn't in English.  But she so cleverly figured out the five petal flower punch makes the cute little "heart shaped" top.  I cut my strip of cardstock to 6 inches and then scored 2 1/2 inches in from each side.  I poked just one end of the strip of cardstock into the punch so that only 2 of the petals punched.  We then wrapped a Hershey nugget with a stamped mailing label and stuck it down with a glue dot. 

Thursday, March 17, 2011

Happy St. Patrick's Day

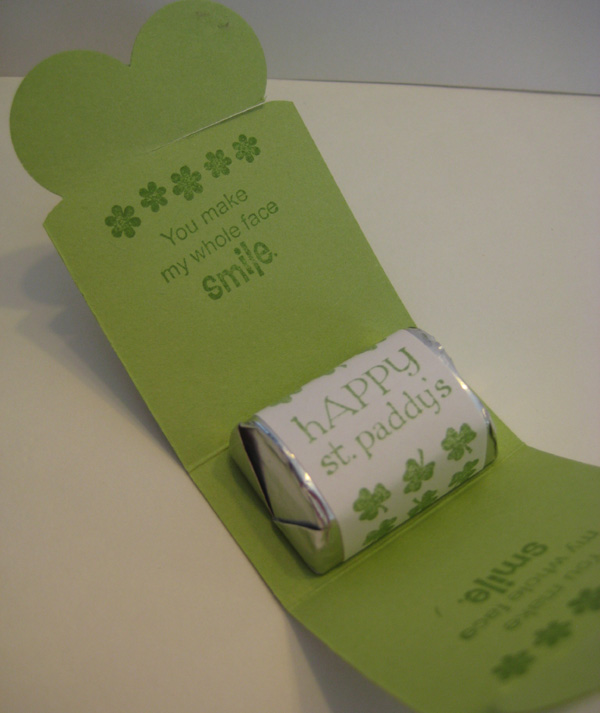
This St. Patrick's Day card features a technique that is new to me.  It's a type of emboss resist that we did using an embossing folder.  Emboss a piece of waxed paper in the embossing folder with your Big Shot.  Then sandwich the piece of embossed waxed paper between two pieces of glossy cardstock (glossy side in) and iron between parchment paper.   Don't forget the parchment paper... it is used to protect your iron.  I ironed with a dry iron on a cotton setting for about 10 seconds.  When you are done, the wax will be left on your glossy cardstock and you can then brayer over it with your color and you've got an awesome background piece to work with.  Because you are sandwiching the waxed paper between two pieces of cardstock, you actually have two very different looking pieces to work with.  And on this card, I only used half of one sheet which yields 4 cards.  The stamps are from the Sale-a-bration set So Happy For You. 
 
Related Posts with Thumbnails
 
Pin It button on image hover