Showing posts with label stampin up. Show all posts

Saturday, April 4, 2026

My Pre-Order Surprise… and What’s Changing with Stampin’ Up! Catalogs


The Joke Was on Me… My Pre-Order Surprise!

A few days ago I asked a  “this or that” question on Facebook:  Should I open my pre-order right away… or be responsible and get some work done first?

I decided to be responsible and save opening the box as my reward.

Well… the joke was on me.

When I finally opened the box, it wasn’t my pre-order at all! It was a shipment of envelopes and several of the new kits from the Kit Collection.


Not exactly the exciting reveal I was expecting.


The good news is that my actual pre-order has arrived, and this time it really was the fun stuff!

One thing you might notice if you look closely… there are no new In Color stamp pads and only one set of Stampin' Blends.

I’m honestly not quite sure how I managed that. Apparently my excitement got ahead of my checklist when I was placing the order!

So yes… another order went in right away.


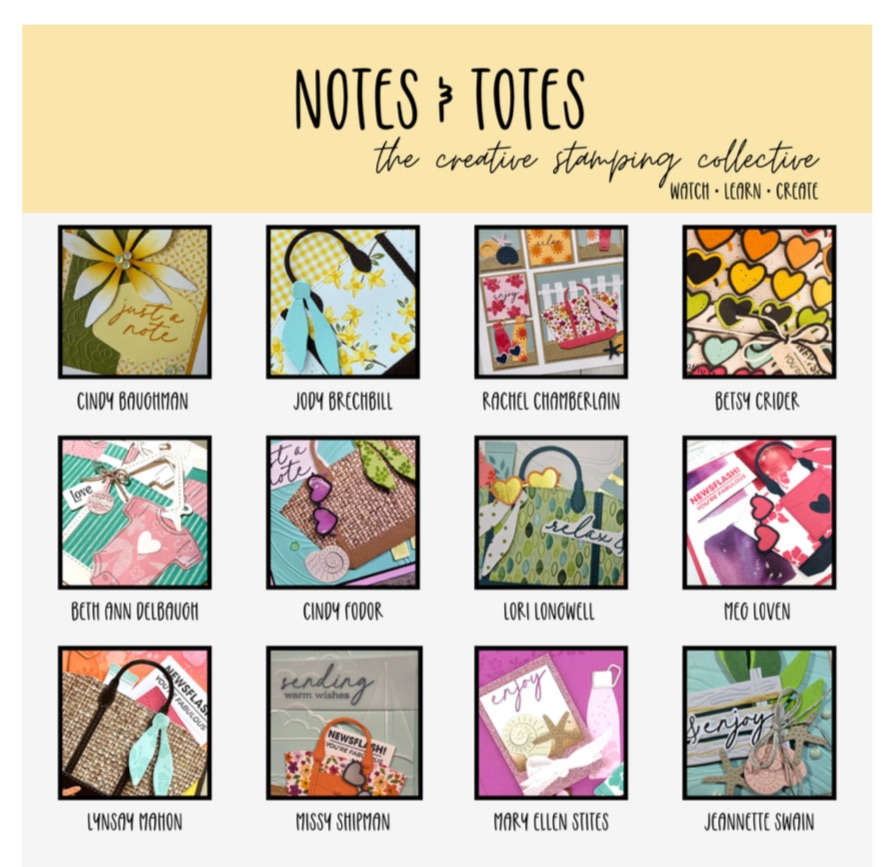
Why Demonstrators Get to Pre-Order

One of the perks of being a Stampin’ Up! demonstrator is getting to order new products early. This allows us to:

  • Create projects to share with you
  • Design class samples and kits
  • Learn the products before the catalog goes live

It’s one of my favorite parts of a new catalog season because it’s when all the creative ideas start flowing.


A New Catalog System

While we’re talking about new products, you may notice that Stampin’ Up! is changing the catalog system this year.

In the past we had one large annual catalog and two smaller mini catalogs.

Now there will be three catalogs each year, each covering about four months:

  • January – April
  • May – August
  • September – December

These catalogs are a little thinner than the old annual catalog but bigger than the minis, and each one will include the basic supplies and tools you need all year long — things like cardstock, adhesives, inks, and other essentials.

Each catalog will also introduce lots of new products, but some items will carry over from one catalog to the next.

You may also occasionally see products at an event or online that aren’t shown in the current catalog. That’s because some carryover items will remain available in the online store even if they aren’t pictured in the catalog anymore.


Online Exclusives

Stampin’ Up! will also continue releasing Online Exclusives, which are products that are only shown in the online store and not in a printed catalog.

New Online Exclusives are released every other month (the odd months), so if you see something online or at an event and can’t find it in a catalog, it’s probably an Online Exclusive.


Last Chance Lists

To keep things fresh, Stampin’ Up! will also continue releasing Last Chance lists every even month.

This is where retiring or discontinuing items show up — often at a discount — while supplies last.

So if you ever have something on your wish list, it’s a good idea not to wait too long!


Back to My Pre-Order…

Now that my actual pre-order has arrived, the fun part begins — playing with the new products and deciding what will show up in:

  • my Stamp-a-Stack classes
  • future INK and Go kits
  • Stampin' 101 classes
  • upcoming projects and tutorials

And waiting for those In Color stamp pads I somehow forgot!


Tuesday, February 3, 2026

Interactive Bandstand Card Using the Easter Basket Bundle

The Easter Basket Bundle and Easter Joy Suite were perfect for creating a bandstand card, which was my final project for my Vacation Stamping School demonstration. It was so much fun creating these 3-D bandstand cards!


The Easter basket die works beautifully for the front of the bandstand because its size spans the distance between the top and bottom pieces. As you can see, I also made a version using a circle die, which gives a different but equally fun look.


Tip: Adding an Easter Bunny in the basket helps provide extra stability to the front of the card because you can glue the bunny ear to the top with the basket handle. 


You can add as much—or as little—detail to the back of the bandstand as you’d like. If you want room for a message, simply add an extra panel.


For even more interest, try placing a battery-operated light inside the bandstand—it really makes the card come to life!

This wraps up my final post featuring the Easter Basket BundleIf you missed the earlier Easter Basket Bundle projects, you can find them all here.

Stretch Your Supplies: Spring and Baby Cards with Easter Joy

Let the Paper Do the Work: Easter Cards with the Easter Joy Suite

Boxes, Baskets & Treat Containers—Oh My! | Easter Joy Suite Gift Packaging


Wednesday, January 21, 2026

January INK and Go Card Kit: Easy Cards You’ll Love Sending


With Christmas—and an early-month demonstration—behind me, I was excited to turn my attention to the January INK and Go Card Kit.

Because Stampin’ Up! policy doesn’t allow pre-stamped images, I’m always looking closely at my dies and Designer Series Paper to create cards that are quick, beautiful, and still feel special. January’s kit came together nicely using just that approach.

I like to include a Valentine’s Day card in the January kit, and the Endless Love bundle was the perfect choice. I used the Hearts of Love Embossing Folder, a couple of die cuts, and a few Loose Valentine's Assortment embellishments. All you need to do is add your favorite Valentine’s greeting to the large heart, and you’ll have cards ready to drop in the mail come February.


The Sunshine and Tulips die is ideal for a “to-go” card kit—it features one large, dramatic die cut that really does all the work. To keep things quick and simple, I stuck with a single background color, but can you imagine this card with different colored tulips? So many possibilities!

The Lovely Garden Designer Series Paper (currently on the Last Chance list) is so striking on its own that it hardly needs anything extra. I added a greeting and just a couple of embellishments, and voilà—the card was finished.

I’m also loving Friendly Foliage. It makes a beautiful stamped card, but I was especially happy that it translated so well into an INK and Go style design. It has a completely different look than the stamped version, which makes the bundle feel even more versatile.

I put these kits together each month for porch pick-up, or I’m happy to drop one in the mail. You can message me directly or find them in my Payhip store.


Tuesday, January 20, 2026

Endless Love Tutorial Inspiration

Looking for a little Valentine’s Day inspiration? 💕 You’re going to love this month’s exclusive digital tutorial featuring the Endless Love Bundle.  You can purchase it here!


Created by The Creative Stamping Collective—a collaboration of 12 Stampin’ Up! demonstrators from across the U.S. and Canada—this tutorial is filled with heartfelt ideas perfect for Valentine’s Day and beyond. Each project showcases creative ways to use the Endless Love Bundle to make cards that celebrate love, friendship, and meaningful connections.

When you purchase this digital download, you’ll receive:

  • 12 exclusive project ideas featuring the Endless Love Bundle

  • Full-color photos of each project

  • Complete materials and measurement lists

  • Step-by-step tutorial videos to guide you through every design

The Creative Stamping Collective releases a new tutorial each month, giving you fresh inspiration and exclusive projects you won’t find anywhere else. Whether you’re creating Valentine cards for loved ones or simply enjoying time in your craft room, this tutorial is a wonderful way to spark your creativity and make something truly special.


Monday, January 12, 2026

Cute as a Bug Side Panel Column Card

I pre-ordered The Cute as a Bug Suite over a month ago and am playing with it for the first time.  It's so cute, and I love that is uses so many different colors. Like so many Stampin' Up! Designer Series Papers, I can't choose my favorite one. So when I was sitting down to create, I decided I'd do a fun fold that would show off two different papers.  


These same ants are in the Designer Series Paper and can be die cut, but I colored them with my blends to save the DSP for another project. I grabbed some of the colors listed on the back of the DSP and colored my ants.  It wasn't until after I finished coloring that I realized I used the same colors as the paper.  Great minds do INK alike!

I've made column cards before so this is a stepped up version - a Side Panel Column card.  Or you may have also see them called a Side Panel Pillar card. It's another great fun fold that goes together easily, but looks impressive.  This won't be the last Side Panel Column card I make this year!


If you would like to see how I made this card, check out my tutorial here:


Sunday, January 11, 2026

Made with Love Double Easel Card

I have really been getting into fun fold cards that are easy to put together but look impressive.  And a Double Easel card does just that!  It stands up for display and it gives the creator a chance to show off more stamping or Designer Series Paper. It doesn't require any special dies, and the measurements are simple.  


I've only made a couple cards with the Made with Love Suite so I thought it was perfect for a Double Easel. After using so much Real Red the last few months, I was happy to pull out my Flirty Flamingo, Strawberry Slush and Bubble Bath for this card.  


Check out my latest tutorial if you want to make one yourself!


Wednesday, January 7, 2026

New Year - New All Occasion Cards

Now that Christmas is over, time to create all occasion cards again.  It was fun to work with new bundles and also an old favorite. If you've stamped with me, you know I try to ask everyone what their favorite card of the night is.  Of course I hope everyone likes them all, but I like hearing everyone's favorites to help me plan for future Stamp-a-Stacks.  I'm happy to say all four cards were chosen as someone's favorite.  

This Z-fold was a great way to show off the versatility of the Pop-Up Petals bundle.  We didn't make a pop-up card this time, but do you recognize the polka dot stamp?  It's the stamp for the center of the flowers!  I borrowed that banner die from Hobby Haven for the front and finished it off with a little ribbon.  


I designed the bee card as a birthday card, but with a couple small tweaks, it could be a valentine card for anyone who needed more than the February valentines we will make at our next Stamp-a-Stack. So happy that Bee My Valentine is still a current stamp set!


This is one of two cards I designed to be a bit more subdued for those stampers asking for sympathy cards.  And this one designed with Lovely Arrangements was great for all occasions - wedding, anniversary, birthday and sympathy.  


This one got a lot of love on Facebook, and I'm so glad everyone liked it.  I was happy to try out the new Lasting Linen background with another new bundle, Friendly Foliage. I think Pretty Peacock and Lost Lagoon were the perfect combination for this thinking of you card.


Saturday, November 15, 2025

Traditions of Christmas Corner Pop-up Fun Fold Card

If you love fun folds that look impressive but are surprisingly easy to create, you’re going to love today’s featured project! This Corner Pop-Up Fun Fold shows off the gorgeous patterns in the Traditions of Christmas Designer Series Paper and gives your a big “wow” factor without complicated steps.


For this version, I used the Traditions of Christmas DSP, and the rich reds, greens, and gold accents really shine. This fold is also a great way to use multiple patterns together while keeping a clean and cohesive look.

I had such a great time making this card, and I think you will too!


Watch the Step-by-Step Tutorial

Want to see exactly how this fun fold comes together?
You can watch the full video here:


In the video, I walk you through the measurements, folding steps, and finishing touches so you can confidently recreate this design at home.

I didn’t want to stop with just one! Below you’ll find photos of additional Corner Pop-Up cards I made, and the first one is another Traditions of Christmas card.  I also used Jolly Delivery, Autumn Wishes, Wildflower Birthday, and Florals in Bloom.  


Thanks for stopping by—and happy crafting!


Thursday, October 23, 2025

Quick & Easy Sunflower Card | 5-Minute INKspiration Tutorial

This beautiful card features a cheerful combination of Pretty Peacock, Very Vanilla, and Lost Lagoon, and it comes together in under five minutes — making it the perfect 5-Minute INKspiration!

I’ve used the Sunflower 3-D Embossing Folder several times this season, and I wanted to find one more creative way to showcase it before moving into all-things-Christmas. In my YouTube tutorial, I demonstrate how to emboss two pieces at the same time to create this lovely layered effect.

I also share why this simple layout is so versatile, plus I show another card using the same layout but with a completely different look — proving how just a few small changes can make a card feel fresh and new!


Tuesday, September 23, 2025

Easy Handmade Card Kit – 5 Minute INKspiration with Perennial Lavender DSP


Friends, let’s be real. Sometimes we want the joy of stamping without the messy desk, 12 tools, and two hours later situation. That’s exactly why I created my INK & Go Kits—because you deserve easy, beautiful projects that make you look like a card-making rockstar in minutes. 

And this month’s kit? Ohhh, she’s a good one.

What’s Inside:

  • Pre-cut cardstock, die cuts, and Designer Series Paper

  • Supplies to make 8 cards (2 each of 4 designs)

  • Envelopes for your finished beauties

  • A handy tip sheet with suggested ink colors + greeting ideas

All you need to add: ink, sentiment stamps, adhesive, and scissors. That’s it. (Translation: no stress, just play.)


Why You’ll Love This Kit

  • It’s fast – each card takes 5 minutes or less to assemble

  • It’s simple – no cutting or measuring

  • It’s flexible – swap in any greetings or colors you already have

  • It’s fun – cheerful designs with a fresh spring vibe

Perfect for birthdays, happy mail, or just because. Honestly, there’s never a bad day to send a card.


 How to Order Your Kit

  • $20 – Porch Pickup

  • $25 – Shipped anywhere in the U.S.

Click here to grab your May INK & Go Kit on Payhip

Kits are while supplies last, so don’t wait too long to snag yours!


INKspiration in Action
Want to see how versatile this kit is? I filmed a brand-new episode of my 5 Minute INKspiration series on YouTube—featuring the Perennial Lavender DSP. It’s a layout you’ll want to use again and again, with scraps you already have at home.

Thanks for stamping with me and taking five minutes to share some sunshine. Remember—your mailbox magic can absolutely make someone’s day because any day is a great day to mail a card. 💜

To Order Stampin' Up! Products On-Line 24/7, CLICK HERE!

Tuesday, September 9, 2025

Create a Stunning Fall Card with the 3-D Sunflower Embossing Folder

3-D sunflower card made with embossing folder and VersaMark for subtle dimension, perfect for fall

I had a wonderful weekend stamping with my friends—Friday night and Saturday morning sessions were full of creativity and fun! There was a lot of brown and earthy tones, but there’s something about fall cards as the summer temperatures cool down—it’s a definitely cozy season.

All of the cards were a hit with my stampers, but the star of the weekend was the 3-D Sunflower Embossing Folder Card. I loved it because it wasn’t the traditional bright yellow you usually expect. My stampers appreciated how easy yet striking it was. I added a little extra dimension by lightly running a VersaMark pad across the sunflowers before assembling the card. It’s such a simple step, but it adds subtle color and depth that really makes the design pop.

This card is perfect for fall greetings or just-because notes, and it’s a great way to impress without spending hours at your crafting table!

Would you like to see how I made it? Check out my latest YouTube video to see this sunflower card in action. It went perfectly with the other three cards we made that weekend—I love doing a mix of embossing, die cutting, and simple techniques.

Which card would you have picked as your favorite? I’d love to hear your thoughts in the comments!


To Order Stampin' Up! Products On-Line 24/7, CLICK HERE!

Saturday, June 7, 2025

June Tutorial Bundle: Impressions Abloom


I’m so excited to share this month’s brand-new tutorial collection with you! The June bundle is here, and it features Impressions Abloom—a fresh, floral-inspired favorite that’s perfect for all your summer stamping.

This creative collection includes 12 step-by-step tutorials from some of my favorite stamping friends (and me!), each featuring unique projects using Impressions Abloom.

Get it FREE when you:
Place a $60 order with me by June 30th

Prefer to just grab the tutorials? No problem!
You can purchase this digital download directly—and even shop past months’ collections too:
👉 https://payhip.com/GreatMindsINKAlikeRachelChamberlain

Each bundle includes:

  • A supply list with measurements

  • A video demonstration link

  • Full-color photos

  • A fun variety of project ideas

Whether you’re building your card stash, looking for a creative escape, or sending thoughtful handmade cards, this bundle is packed with INKspiration to keep you crafting.

Missed a past month? No worries—tutorials are always available and perfect to work through at your own pace.

Let me know if you need help placing an order or finding a past bundle.

🖋️ Every day is a great day to send a card. 💌

Happy stamping,
Rachel

Weekend Stamp-a-Stack Recap – So Much Fun


What a wonderful weekend of stamping fun!  I hosted two Stamp Stack sessions—one Friday night and another on Saturday—and both were full of laughter, creativity, and great company. It’s always a joy to gather with friends (new and returning!) and spend time making something beautiful together.

We created eight cards total—two of each of four different designs—so everyone went home with a nice stash ready to mail. I love offering a wide variety of greeting stamps, so each person can personalize their cards for birthdays, thank yous, thinking of you, sympathy, or whatever they need most. It’s always fun to see the unique combinations everyone comes up with!

If you missed out, don’t worry! I’ve got tutorials to help you create some of these cards at home:

🎥 Peaceful View "Happy Birthday" Card
This one was featured in my last blog post—if you didn’t catch it, be sure to scroll back and take a look! Watch it on YouTube here!

🎥 "Just a Note" Fun Fold Card – Facebook Live Replay
Watch it on YouTube here!

🎥 Extraordinary Flora Card – Facebook Live Replay
Catch the tutorial here!

I love how each card turned out, and it’s even better knowing they’ll be sent out to brighten someone’s day. 💌

Thank you to everyone who joined me—I can’t wait to stamp with you again soon!

Until then, keep sharing kindness—one card at a time.

Tuesday, June 3, 2025

Serene Ink Blending with Peaceful View — Cardmaking Inspiration

Looking for a peaceful, nature-inspired card idea? This project features the Peaceful View background stamp and soft ink blending with Stampin’ Up! Blending Brushes to create a calming scene that works beautifully for birthdays, encouragement, thinking of you, or just because.

🎥 Watch the video below to see how this card comes together—from choosing your ink colors to blending tips and finishing touches:


Supplies used for this card:

  • Peaceful View background stamp

  • Blending Brushes

  • Ink pads: Early Espresso, Pool Party, Daffodil Delight, Old Olive

  • Basic White, Old Olive, and Early Espresso

  • Sentiment stamp: Happy Birthday from Round We Go

Soft ink blending is one of my favorite techniques—it’s simple, relaxing, and always delivers a wow factor. I hope this project inspires you to get your brushes out and play with color!


This card isn’t part of my current INK and Go Kit, but if you love the idea of quick and satisfying cardmaking, I’ve got you covered! My INK and Go Kits are designed for easy creativity—just grab your ink and start stamping. Each kit includes pre-cut cardstock and coordinating designs so you can make beautiful cards in minutes.

🛒 Browse current kits and tutorials in my online store!

Thanks for stopping by and happy stamping!


Rachel

Tuesday, May 27, 2025

Last Chance to Get the May "Notes & Totes Tutorial FREE!

May is almost over—which means it’s your last chance to get this month’s exclusive Notes & Totes tutorial bundle FREE with a $60 order!

This creative collection includes 12 step-by-step tutorials from some of my favorite stamping friends (and me!), each featuring unique projects inspired by the theme “Notes & Totes.” 

 Get it FREE when you:
 Place a $60 order with me by May 31st

 Prefer to just grab the tutorials? No problem!
You can also purchase this digital download directly—and even shop past month’s collections too! https://payhip.com/GreatMindsINKAlikeRachelChamberlain

Each bundle includes:

  • A supply list with measurements
  • A video demonstration link
  • Color photos
  • A fun variety of projects

June’s bundle is just around the corner—but if you missed earlier ones or want to collect them all, you still can. These tutorials are always available to purchase and perfect to work through at your own pace.

Let me know if you need help placing an order or finding a past bundle that inspires you!

Every day is a great day to send a card. 💌

Happy stamping,
Rachel

Think Outside the Box - A Graduation Card with a Twist!

Have you ever needed a card in very specific colors—and couldn’t find anything in your stash that fit the bill? That was me this past weekend. I needed an orange and black graduation card for a special graduate and party, and I wanted it to feel coordinated and thoughtful. So, I did what any creative crafter would do: I raided my Halloween paper!


Yes, you read that right. Halloween paper! I knew I’d find orange and black in one place, and sure enough, I had a pack of retired Designer Series Paper that fit the theme perfectly. I flipped through and found some great coordinating prints. (Hot tip: There’s almost always a more neutral or subtle pattern on the back of seasonal DSP!)

I paired the paper with a fun retired stamp set, Go Graduate,
and made a matching mini note card to tuck in my personal message.

One unexpected challenge? When I opened the card, the reverse side of the DSP showed a bit of purple—which clashed with my theme. It bugged me enough that I added a piece of black cardstock to the inside to hide it. Problem solved! And then I decided to recolor the little owl on my note card to make it a bit more subtle.

This project is a great reminder that sometimes, the most creative solutions come when we’re willing to use supplies in unexpected ways. Even though I was using retired products, I still found joy in mixing and matching to create something meaningful.

So the next time you’re stuck, don’t be afraid to flip that paper over or look at seasonal sets with fresh eyes. There might be a perfect solution right there in your stash—you just haven’t seen it that way yet.

Related Posts with Thumbnails
 
Pin It button on image hover