Showing posts with label Big Shot. Show all posts

Sunday, May 6, 2012

Double Embossing Strawberry Card

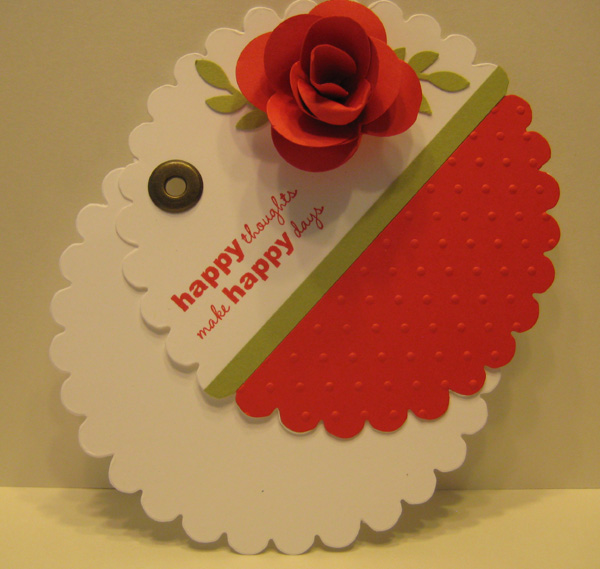
Here is one the samples I made for my recent demonstration of embossing folder techniques.  When you run card stock through a Big Shot twice in two different embossing folders, you get a frame on an already textured piece of card stock.   

            ·         Cut desired shape from chipboard Save
                 both pieces. 

·         Attach chipboard to the back of both embossing folders using Dotto.  Fig. 1   

·         Place card stock in embossing folder.   

·         Use Tab 2 on Multipurpose Platform.  Pace embossing folder with chipboard side down and cover with one clear cutting pad.  Emboss with Big Shot.

·         Position smaller embossing folder over blank area left in card stock.  Fig. 2 

·         Emboss again in Big Shot.  Fig. 3 

Some adjustments may need to be made depending on the thickness of your chipboard.  I used the leftover chipboard from my Specialty DSP packages.


I've got a lot more to post in the next couple of weeks, and there are a lot of great samples of this technique available on the web.  Angie Leach has a detailed tutorial on her blog.   


To Order Stampin' Up! Products On-Line 24/7, CLICK HERE!

Tuesday, February 28, 2012

Pixy Stix Butterfly

I've been working on these butterflies since October.  I know you're thinking - what?!?!  I'll explain.  I got together with my stamping friends last fall at Deana's house.  We all brought our own projects.  When I finished what I was working on, I spent my time cranking all of these butterflies out on my Big Shot with a borrowed die.  So when we stamped at Rae Anne's house last month, I stamped the back and assembled them so I was ready for Valentine's Day - no stamping February 13th like most years for me!

To Order Stampin' Up! Products On-Line 24/7, CLICK HERE!

Monday, October 24, 2011

Tuesday, June 21, 2011

Sunny Inlaid Embossing Card

We have more rain forecasted for this afternoon so this sunny flower garden seems like the right card to post today.  This is one of the projects we will be doing tonight at stamp club.  There is nothing hard about it, but there is a lot of punching...  It is larger than a standard card in order to all for all of the flowers to fit.  But as I was trying out different layers, I decided that extra Whisper White scallop square around it adds a lot and was worth the bigger size.
 
To Order Stampin' Up! Products On-Line 24/7, CLICK HERE!

Saturday, May 21, 2011

Embossed Wedding Card

At our Spring into Stamping meeting last month, Tami White demonstrated embossing folders.  Some people cut them to emboss only part of the card, but this is so much better for people like me.  I had ordered this embossing folder a long time ago when I first learned you could cut the folder and create sections of embossing, but I just couldn't bring myself to cut into it and "destroy" it.  So it sat in my drawer until I saw this!  Emboss a piece of cardstock and use it at your pattern.  Trim away the parts you don't want embossed and then cut a piece of chipboard to match.  Put that chipboard (I taped my down so it wouldn't move) on the outside of your folder.  Run it through your Big Shot on platform 2 with only 1 cutting pad.  I added some rhinestones in the middle of the designs for just a little bling. 

Sunday, March 27, 2011

Here Comes Peter Cottontail

Shanon is having a workshop this afternoon and here is part of her hostess gift.  I will credit Julie Davison with the idea as I think I came home from a meeting and recreated this project of hers.  I used the scallop circle Big Shot die and assorted punches, filled it with M & Ms, and it's ready to go.  I might have to make a couple more for Easter treats for my niece and nephew. 

Thursday, March 17, 2011

Happy St. Patrick's Day

This St. Patrick's Day card features a technique that is new to me.  It's a type of emboss resist that we did using an embossing folder.  Emboss a piece of waxed paper in the embossing folder with your Big Shot.  Then sandwich the piece of embossed waxed paper between two pieces of glossy cardstock (glossy side in) and iron between parchment paper.   Don't forget the parchment paper... it is used to protect your iron.  I ironed with a dry iron on a cotton setting for about 10 seconds.  When you are done, the wax will be left on your glossy cardstock and you can then brayer over it with your color and you've got an awesome background piece to work with.  Because you are sandwiching the waxed paper between two pieces of cardstock, you actually have two very different looking pieces to work with.  And on this card, I only used half of one sheet which yields 4 cards.  The stamps are from the Sale-a-bration set So Happy For You. 
 

Thursday, March 10, 2011

Manly Birthday

Last weekend's stamp-a-stacks were birthday themed so here is the masculine card we did.  I kept it pretty simple with no accessories of any kind... which was hard for me to do!  But the Marina Mist, Chocolate Chip and Crumb Cake were a good color combination to work with, and I liked how these turned out!

To Order Stampin' Up! Products On-Line 24/7, CLICK HERE!

Saturday, December 18, 2010

While designing cards for my recent Stamp Club, I knew I wanted to do a pop-up tree.  I wasn't sure what to do for the front, but I really like what I came up with because it doesn't really give much of a hint as to what's inside.
Here's the inside and a close up of the tree after we ran the parts through the Big Shot with an embossing folder.


Saturday, December 11, 2010

Christmas Gift Card Holders

Hang your gift cards on the tree or send them off in an envelope - it's easy to do with your Big Shot and scallop circle die.  Use any Designer Series Paper and stamps to personalize your "ornament".    We'll be making these Tuesday in Stamp Club.  I will give the ladies their choice of paper from the Candy Cane Christmas DSP (although it doesn't show up in the picture, I chose the two papers that had glitter on them for a little extra bling).  Let me know if you would like to join us! 


Tuesday, December 7, 2010

Christmas Treat Boxes

After making several of these Halloween treat containers with the Candy Wrapper Bigz Die, it seemed to be an easy switch to Christmas.  I used the Northern Flurry Textured Impressions Embossing Folder from the holiday mini catalog.  You can see the seam of the box at the top - that's because I wanted to put my Merry Christmas scallop on the side with the fewest snowflakes.  Although the ribbon isn't necessary to keep the box closed, I think it adds some color and keeps the recipient from peeking!
To Order Stampin' Up! Products On-Line 24/7, CLICK HERE!

Sunday, November 28, 2010

Bring on Christmas!

After Thanksgiving, it has become a bit of a tradition that my mom, sister and I make Christmas cards.  So instead of shopping, we are busy cutting, punching, and stamping.  The kids even got in on the action this year!  Looks like someone will have a job next year too!

Friday, November 26, 2010

Movers and Shapers Christmas


My upline, Meg, hosts an APEX (A Positive Example) event once a quarter. Those demonstrators in her group that qualify to participate make a "wow" swap. This is my version of a card one of the fabulous demonstrators in our group made for our swap last fall. (I am afraid I don't know who created the original.) There were just too many to do last holiday season!
To make this card, we embossed using the embossing folder and then used the Movers and Shapers die and ornament punch for this layered look. I don't know what I did before my Big Shot!

Sunday, November 7, 2010

Frosty Flurries

Here is one of the cards we did Friday and Saturday at my Christmas Stamp-a-Stacks. I have discovered that I tend to gravitate to blue and red combinations for snowy or snowman cards. But this year, with our new colors, I could use Baja Breeze to mix it up a little. This little snowman come from the Jolly Old Saint Nick set in the current mini catalog. I fell in love with the Santa in that set, but there are other great stamps in it too! We also used the Northern Flurry Impressions Embossing Folder for the background. Some of the ladies even ran their envelopes through the Big Shot to create snowflakey envelopes.  Then we finished it with the Merry Christmas from Teeny Tiny Wishes and the Word Window punch. 


To Order Stampin' Up! Products On-Line 24/7, CLICK HERE!

Saturday, September 11, 2010

Spooky Treat Box

With a few folds and twists, this this spider web becomes a cute little Halloween treat box:

I used the new Candy Wrapper Bigz L Die and Spider Web Impressions Embossing Folder to make this quick little treat box.  I usually give my second graders pencils and teachery gifts for Halloween, but this is pretty tempting for this stamping teacher!  Maybe I will just have to make a few for my special trick-or-treaters. 

This box twists up and actually does stay by itself, but I liked the added ribbon with the touch of white along the edge. 

Thursday, August 19, 2010

Happy Thoughts Circle Card

I call this a circle card. I am not sure if that's what it is really called, but that's what I am going with until I learn differently :-) We did this in club last week and I thought this fantastic flower needed a slightly "fancier" card base. Using the scallop circle and the Big Shot, cut two and attach them with a jumbo eyelet. Be careful not to squeeze the Crop-a-dile too tightly because we want the card to swing open to reveal your greeting.  

You can find the directions for this flower at www.simistamper.blogspot.com/2010/02/instructions-for-paper-rose.html.  Thanks to Rae Anne for finding these directions and teaching me this flower. 
To Order Stampin' Up! Products On-Line 24/7, CLICK HERE!

Tuesday, July 13, 2010

Fishy Treat Cups

Think you've done it all with the treat cups? Have you tried water? That's right. Water! A few months ago Leslie demonstrated this at our Spring into Stamping meeting (she credited Vanessa Webb with the idea).
I added a small amount of Dazzling Diamonds and filled the treat cup nearly to the top. I think I will advise the stamp club ladies to go even fuller than I did. You can't really see the glitter in the picture, but it really looks like a snow globe. I also ran the bottom piece of Marina Mist through the Big Shot with Texture Plate Kit #4 to create my "waves".

Fill the treat cup, remove backing to reveal the sticky part of the treat cup and then stick completely to a window sheet. Then assemble the card as you would any other card. I am so glad there are creative people out there to come up with these things. I have heard of people putting drops of dish soap in the water too, but I like the glitter well enough I didn't try the dish soap.

Supplies:
Stamp set: Something Sweet
Ink: Tangerine Tango, Marina Mist
Cardstock: Whisper White, Bashful Blue, Marina Mist
Accessories: Treat Cup, Window Sheet, Big Shot, Texture Plate Kit #4

Tuesday, June 22, 2010

New Hostess Set Sneak Peek

This card uses two new hostess stamp sets and two returning (former In-Colors) colors. It was so much fun inking up these brand new stamps for a swap I am participating in with other demos. I used Pink Pirouette and Wild Wasabi to color directly onto the stamp. For those of you who already own those ink pads, there are now markers to match! I liked the soft look created by layering vellum paper and then stamping the words on the top layer.


Stampin' Up! gave us demonstrators the Just Because set, and I think I will be getting a lot of use out of it - I even stamped the hydrangeas on the envelope I used to mail my swaps!

Supplies: Just Because (Level 1 hostess), Occasional Quotes (Level 3 hostess) stamp sets, Pink Pirouette, vellum, Whisper White and Wild Wasabi cardstock, Pink Pirouette, Wild Wasabi ink, Big Shot, Top Note die, crop-a-dile, organza ribbon


Tuesday, June 15, 2010

Birthday Tulips

This card was inspired by a beautiful birthday card I received from Cheryl Camp. I had resisted buying the 2-step bird punch.... until I realized I could make tulips with it! Thanks Cheryl! So after my birthday, I ordered the punch and knew this would be a June stamp club project. Each tulip uses 3 wing pieces from the 2-step bird punch. The stems and leaves come from the same punch and the vase is made with the ornament punch (cut the tip off). The faux frame was created by punching two Top Note pieces and cutting the Whisper White on the dotted line.  What a great way to use these punches, huh? 

Supplies: Orchid Opulence, Rich Razzleberry, Whisper White, Certainly Celery cardstock, Top Note die, Big Shot, 2-step bird, ornament punches


Saturday, June 12, 2010

Bouncing Brayer Sunset


This stamp club project features the Bouncing Brayer technique. And it's one of those cards that started as one idea and before I was done, it was a completely different card.  It evolved into a sunrise/sunset card simply because I chose Only Orange for my first try, and the orange looked like rays of sun.  For the water, I ran my Bashful Blue through the Big Shot with a texturz plate, and for the sand, I spritzed it with Log Cabin Smooch Spritz. 

For Bouncing Brayer, you ink up a brayer and place one end of the brayer in the center. Turn your cardstock as you tap the brayer and occasionally give it a slight roll. The one end needs to stay close to the center the entire time. You may need to reink, and you will probably need to go around again. Another option is to roll over your cardstock like you would normally to fill in the white spaces. I used glossy cardstock, but it also works with regular Whisper White, and you can do more than one color. It can be very striking when you stamp a large solid image over the center, but for my purposes, I only used half.

Supplies: Tropical Party and Upsy Daisy stamp sets, Only Orange, Close to Cocoa, Green Galore ink, Summer Sun, Glossy White, Bashful Blue, Creamy Caramel cardstock, Big Shot, Texture Plates Kit #4, brayer, Log Cabin Smooch Spritz, Scallop Oval punch and Large Oval punch, 1 3/8 inch circle punch


Related Posts with Thumbnails
 
Pin It button on image hover